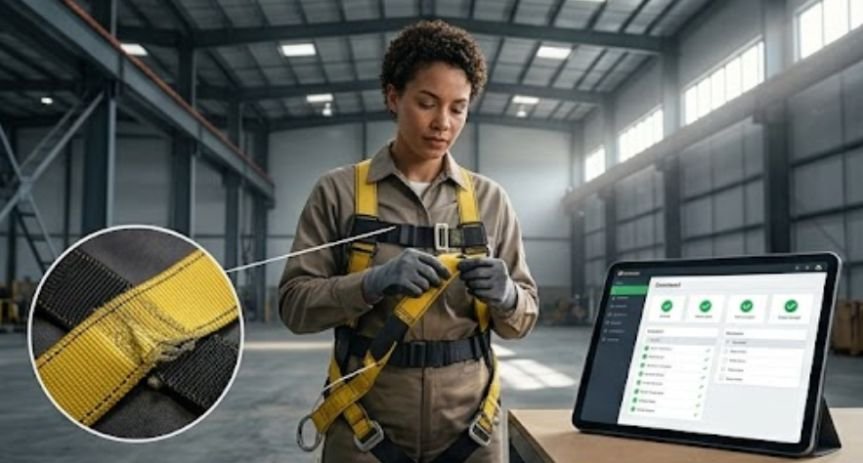
Stepping onto a high platform brings an undeniable rush, but taking time to review your gear keeps that excitement completely safe. Knowing how to inspect a safety harness properly gives you total confidence before your boots leave the ground. Catching a tiny fray or a cracked buckle on deck takes just a few minutes, yet it ensures your personal fall arrest system performs flawlessly when you need it most.
Key Takeaways
- Inspect your safety harness before every single shift using both visual scans and hands-on checks.
- Bend webbing into an inverted U-shape to reveal hidden fiber cracks, chemical burns, or UV damage.
- Check metal hardware for rust, cracks, deformed frames, or faulty locking spring mechanisms.
- Confirm that impact indicators are intact and product labels remain fully legible.
- Remove damaged equipment from service instantly by destroying straps to prevent accidental reuse.
Core Rules for Fall Protection Equipment
Following established workplace guidelines ensures every piece of fall arrest gear meets strict safety performance criteria.
Workers and supervisors should also understand when fall protection is required before elevated work begins, since the applicable height threshold, work surface, and hazards below determine which protective system must be in place.
Pre-Shift Verification Routine
A safety harness inspection must be conducted before every use, following guidelines from OSHA Harness Inspection Guidelines. Hold the harness by the back D-ring, shake it out, and inspect the hardware for cracks, warping, or rust. Hand-over-hand, check the webbing and stitching for cuts, frays, chemical burns, and UV damage, and immediately remove the harness from service if any impact indicators have deployed.
Taking a few moments before stepping onto scaffolding catches subtle flaws caused by rough storage or harsh outdoor weather. Using your hands to feel along the synthetic fibers helps identify stiff spots or chemical damage that simple visual scans miss. This initial pre-use ritual forms the foundation of reliable job site fall protection.
Official Compliance Guidelines
Federal standards require every worker to verify their personal protective equipment prior to starting elevated tasks. Besides daily checks, workplace rules mandate a comprehensive formal inspection by an authorized competent person at least once every year. Keeping written records of these regular checks protects workers while keeping your facility compliant with current safety regulations.
Step-by-Step Inspection Process
Following a systematic sequence ensures you examine every single component, buckle, and stitch pattern without skipping critical details.
1. Hardware Inspection
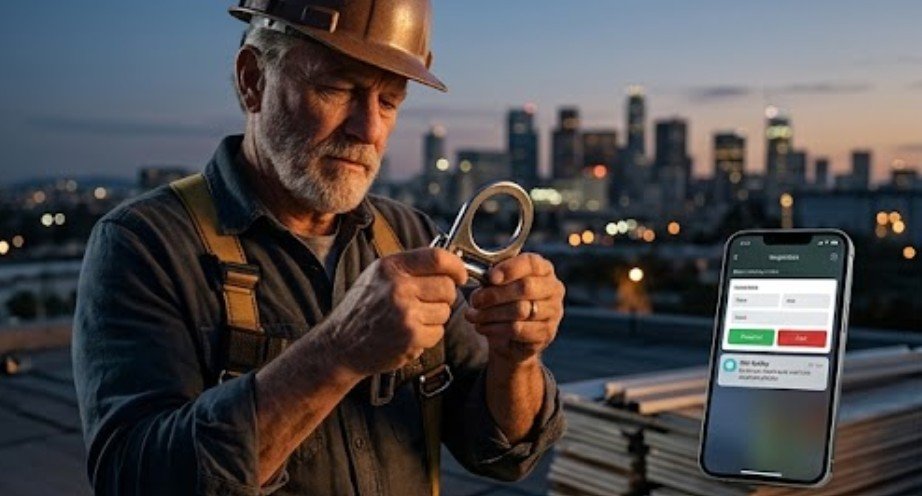
Inspect all metal components including the dorsal D-ring, chest buckles, and adjusters.
Look for deformation, cracks, sharp edges, rust, or deep scratches that could slice into fabric straps during heavy loads. Make sure buckles connect securely, springs move freely, and locking mechanisms engage correctly, such as locking into a visible green dot on quick-connect buckles. Check that all metal grommets sit firmly seated without tearing through the surrounding fabric material.
Examine side positioning D-rings and adjustment plates to confirm they slide smoothly without binding along the structural webbing. Ensure that plastic keeper loops and back pads remain free of deep fractures or severe distortion. Any metal part showing deep corrosion or mechanical failure requires immediate equipment retirement.
2. Webbing and Stitching Inspection
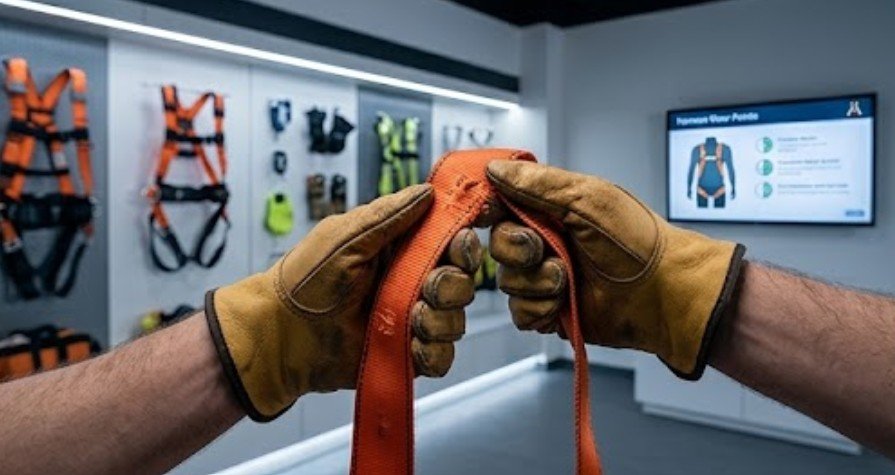
Using your bare hands, check every inch of the straps for physical and chemical damage.
Scan visually for fabric fading, which can indicate UV damage, weld spatters, or chemical discoloration along the straps. Bend the webbing into an inverted U shape to expose hidden inner fibers and surface cracking. Feel for hard, shiny spots indicating heat damage or areas of uneven thickness indicating undue stretching from previous loads.
Check all safety stitching patterns to ensure threads are completely intact and not pulled, frayed, or missing entirely. Pay close attention to high-stress junction points where shoulder and leg straps intersect under structural backing plates. Damaged load-bearing threads drastically reduce harness strength and require taking the gear out of service right away.
3. Fall / Impact Indicators
Inspect the shock absorbers and impact indicator tabs on the harness.
Look closely at the sewn folds near the dorsal D-ring or sub-pelvic area designed to deploy during a fall. If the harness has deployed impact indicator tags indicating a fall, or if the stitching has torn out, the harness must be permanently taken out of commission and destroyed. Never attempt to restitch or bypass a deployed shock indicator flag under any circumstances.
Even subtle stitch tearing along indicator folds signals that the equipment absorbed heavy force loads previously. Documenting deployed flags ensures that compromised safety gear is identified immediately by crew members. Retiring impacted equipment keeps unsafe harnesses off active work sites permanently.
4. Labels and Tags
Ensure that all product and inspection labels are securely attached and fully legible.
Check the manufacturer identification pack usually housed inside a protective fabric sleeve on the shoulder strap. If the inspection log tag is expired, or if you cannot read the manufacture date or model number, the harness must be retired immediately. Missing certifications make it impossible to prove compliance during official site audits.
Verify that the serial number matches your company inventory records for accurate tracking and maintenance logs. Protect label packs from direct chemical exposure or heavy abrasion to maintain legibility over time. Intact tags provide necessary proof that your equipment meets current ANSI and OSHA performance criteria.
Proper Equipment Maintenance and Storage
Taking good care of your fall arrest equipment extends its working lifespan and keeps structural fibers strong.
Harness care should form part of a wider safety program that identifies common workplace hazards and how to control them, including chemical exposure, sharp tools, falling objects, poor storage conditions, and damaged protective equipment.
Cleaning Synthetic Webbing
Clean dirt, mud, and grit off your harness using a clean sponge soaked in warm water and mild soap. Sponge down the synthetic web slings gently until a light lather lifts away surface contaminants, then rinse thoroughly with fresh water. Never use harsh industrial bleaches, solvents, or high-pressure washers that can degrade synthetic fibers.
Allow the wet harness to dry naturally in a well-ventilated indoor space away from direct heating elements. Excessive radiant heat can shrink synthetic fibers or make structural stitching brittle over time. Regular gentle cleaning prevents abrasive grit from working deep into structural webbing weaves.
Safe Storage Methods

Store your clean, dry harness by hanging it by the back D-ring inside a dark, climate-controlled storage locker. Keep fall protection gear far away from battery acids, chemical fumes, direct sunlight, and sharp hand tools. Storing gear properly prevents accidental UV degradation, chemical burns, or physical punctures while not in use.
Avoid leaving harnesses lying on dirty van floors or stuffed tightly inside unvented toolboxes for extended periods. Keeping equipment hung freely maintains its shape and protects flexible webbing from permanent creasing. Proper storage practices ensure your gear remains ready for immediate inspection and safe use.
Proper Disposal Rules
When a safety harness fails inspection, remove it from active service immediately and mark it clearly as unusable. Cut the load-bearing straps into short pieces and remove metal D-rings using heavy shears to prevent accidental reuse. Discarding ruined gear properly guarantees nobody ever wears compromised fall protection on your job site.
Maintain an updated equipment log recording the retirement date and serial number of every destroyed harness. Replacing old gear promptly keeps your inventory modern, safe, and fully compliant with industrial standards. Responsible disposal habits protect workers from using unsafe equipment aloft.
Frequently Asked Questions
1. How do you inspect a safety harness properly before work?
You inspect a safety harness by holding it by the back D-ring, shaking it out, and checking metal parts for rust or cracks. Then, run your hands along the webbing using the inverted U-shape test to spot frays, chemical damage, or deployed impact indicators.
2. How often must a safety harness be inspected on the job?
A safety harness must be inspected by the user before every single work shift. Additionally, OSHA guidelines mandate a formal, documented inspection by a trained competent person at least once every 12 months, or more frequently in harsh working environments.
3. What causes a safety harness to fail inspection automatically?
A safety harness fails inspection automatically if it shows cut webbing, missing stitching, cracked metal hardware, or deployed impact indicators. Missing or unreadable manufacturer labels also cause an immediate failure, requiring the harness to be taken out of service right away.
4. Can you use a harness after it stops a fall?
No, you can never use a safety harness again after it arrests a fall. The extreme forces stretch webbing fibers and rupture internal impact indicators. You must take the harness out of service immediately and destroy it to prevent future use.
Strap In, Stay Safe, and Elevate Your Gear Checks!
Mastering how to inspect a safety harness ensures you stay completely secure every time you work at heights. Taking a few moments to check hardware, flex webbing, and verify intact labels prevents unexpected equipment failures on the job site. Make thorough pre-use checks a daily habit, store your gear properly, and always keep your fall protection equipment in top-notch condition.